The Kirsten Project | Happy Birthday, Kirsten!
/Spring has arrived! The chickens are laying a rainbow of colorful eggs, the redbuds have popped and the fruit trees are blooming! Warmer days lead us outside to play and prepare our gardens for the summer ahead! Between these moments, I’ve been sneaking away time here and there to finish my 1850s spring dress, based off Happy Birthday, Kirsten! and I am so happy with how the project has turned out! I’d love to tell you more about my design process and how I took the original cover art by Renée Graef and translated it into women’s dress informed by the fashion trends of the era. If you haven’t see my research posts on 200 Years of Gingham, Tiered Skirts, Girls’ Dresses, Pink in the 19th century or my intro post, I encourage you to check those out first! This edition of The Kirsten Project requires a little more description, so grab a hot cup of coffee and join me for this springtime delight!
While past my costumes (Meet Kirsten, Kirsten’s Surprise and Changes for Kirsten) have very closely mirrored the illustrations and doll clothes, I’ve taken more artistic liberties based on historical sources with the adult version of Kirsten’s springtime dress.
Let’s start with the obvious: for my woman’s interpretation of the birthday dress, I have chosen not to wear a pinafore style apron. I’ve made this decision for a couple of reasons: firstly, pinafores, like the one worn by Kirsten are almost entirely worn by younger girls (like I did in my childhood version, 28 years ago!) Secondly, if an adult women did wear an apron, it would have almost always been a practical work time covering for her dress and not a fashion accessory. Of course there are always outlying examples against the rule, but I’m happy with my choice to omit a pinafore from my version of this costume. As with past projects I have found some extant items of what I’m guessing the team at Pleasant Company may have referenced, which you can find on my corresponding research post. (All of my visual examples are on that page, so keep it open to look back to as you read this post!)
Neckline
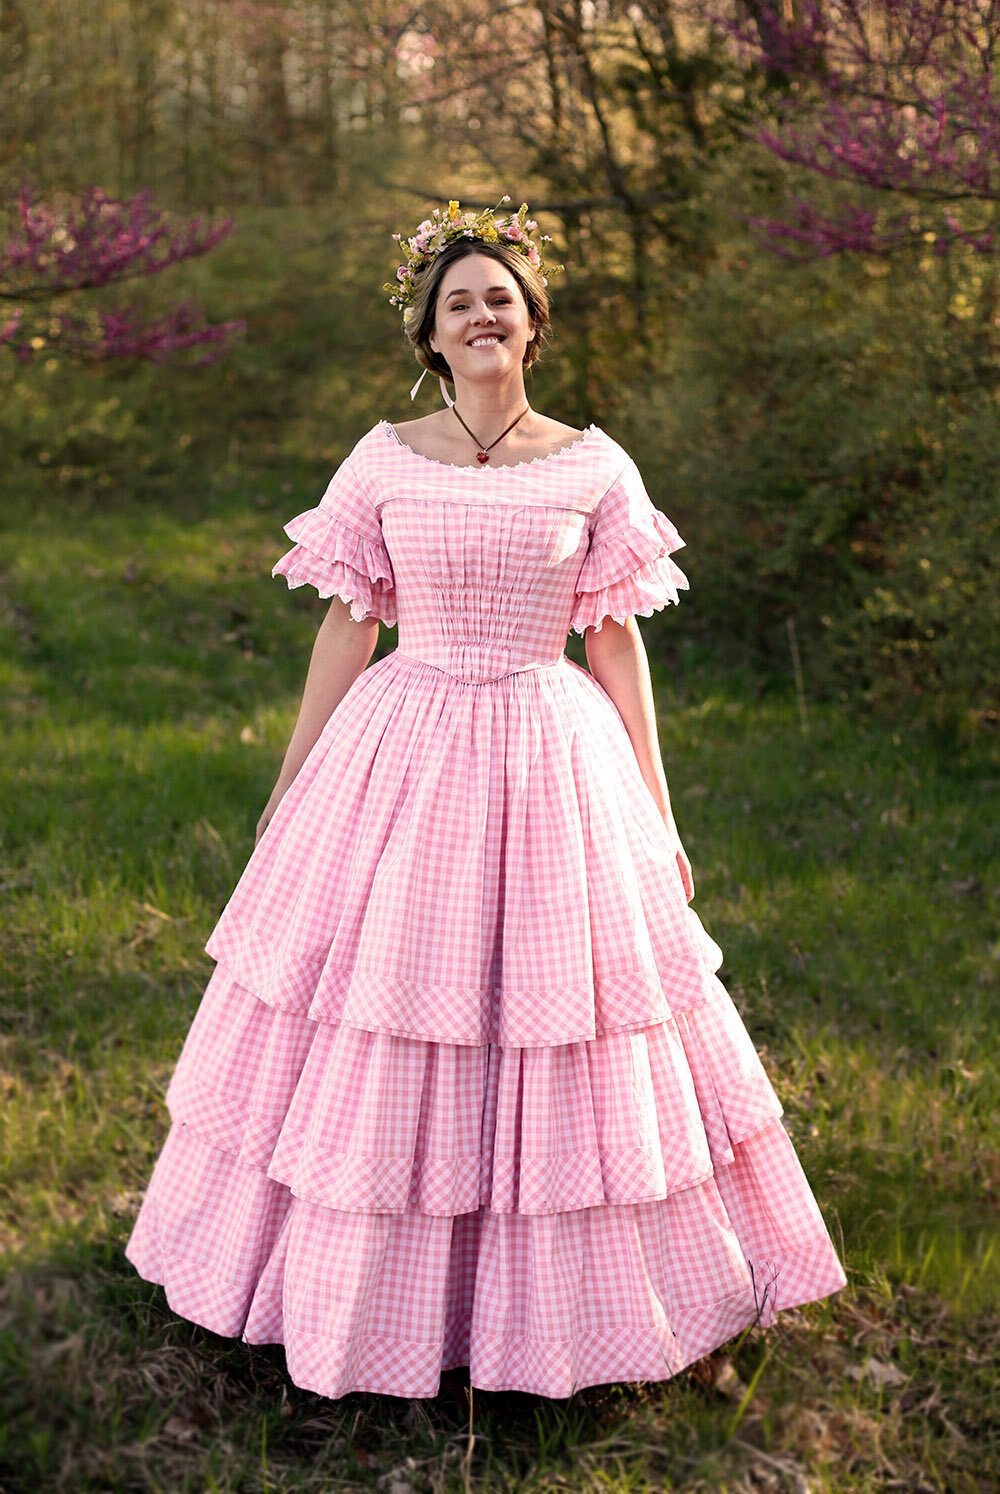
Instead of the high neckline of the Pleasant Company Kirsten birthday dress, I’ve instead opted for a lower and wider shape and I did this to bring some variation to the project. It’s absolutely historically correct for women and girls to have worn high necklines through the 1850s but it’s also correct to see a more open shape. If you look back to my post on popular girl’s silhouettes of this era, you’ll see how this holds true. A wide neck, short sleeve, gathered front dress was incredibly popular through a large majority of the 19th century (example 2, 2.1). Sometimes these open necklines are paired with an additional layer underneath for modesty or morning/afternoon wear (example 3).
Because I’ve omitted the pinafore, I chose to using vintage crochet lace at the neckline with a slight triangular shape. I’ve found examples of this in daguerreotypes (example 4, 4.1) and I think it nicely mirrors the lines of Kirsten’s apron without being childish.
Bodice
My starting point for this dress was a commercial pattern (McCalls 7988) drafted by costumer Angela Clayton, based off of a dress from the Metropolitan Museum of Art (example 5).
The bodice is composed on a yoke, gathered center front portion and sides that wrap around the torso to a back princess seam and two center back sections. This kind of construction really reminds me of 18th Century Italian gowns because there is no side seam like we see in modern clothing. The yoke also extends over the shoulder just like an 18th century style. If you look closely you can see I paid careful attention to matching my plaid, which meant that I sewed almost every seam by hand to get a perfect flow of the gingham! The bodice is lined in white twill to give it extra strength because the skirt is very heavy. Two boning channels finish out the center back and trouser hooks and bars are sewn to the lining to close the bodice.
Even though I didn’t layer a pinafore over top my dress, check out how the front style lines both narrow in at the waist. This style of bodice was common for both girls and women, as can be seen in examples 6, 6.1.
Sleeves
In her birthday story, Kirsten wears a short sleeved dress. This presents a slight problem for an adult interpretation because women of the 1850s did not often reveal their bare arms during the day - both out of modesty and practicality. For evening attire the rules change as one is surrounded by her peers and may show more skin.
The dropped shoulder attaches to layered upper and lower sleeves and two sets of 36” of ruffles. These two sleeves are stacked on top of one another and then sewn to the shoulder seem. Piping is used throughout. Like the neckline, I trimmed the lower sleeve ruffle with antique hand crocheted trim to refer back to the pointed trim on Kirsten’s apron.
For these photos I’ve decided to style the dress without an under layer because I wanted to capture the look and feel of Kirsten’s birthday dress, but I have posed for a few shots with the dress over a shirt waist - a look shown in many fashion plates from the 1850s (example 7, 7.1, 7.2). I’ll post those in coming weeks on my instagram page.
Skirt
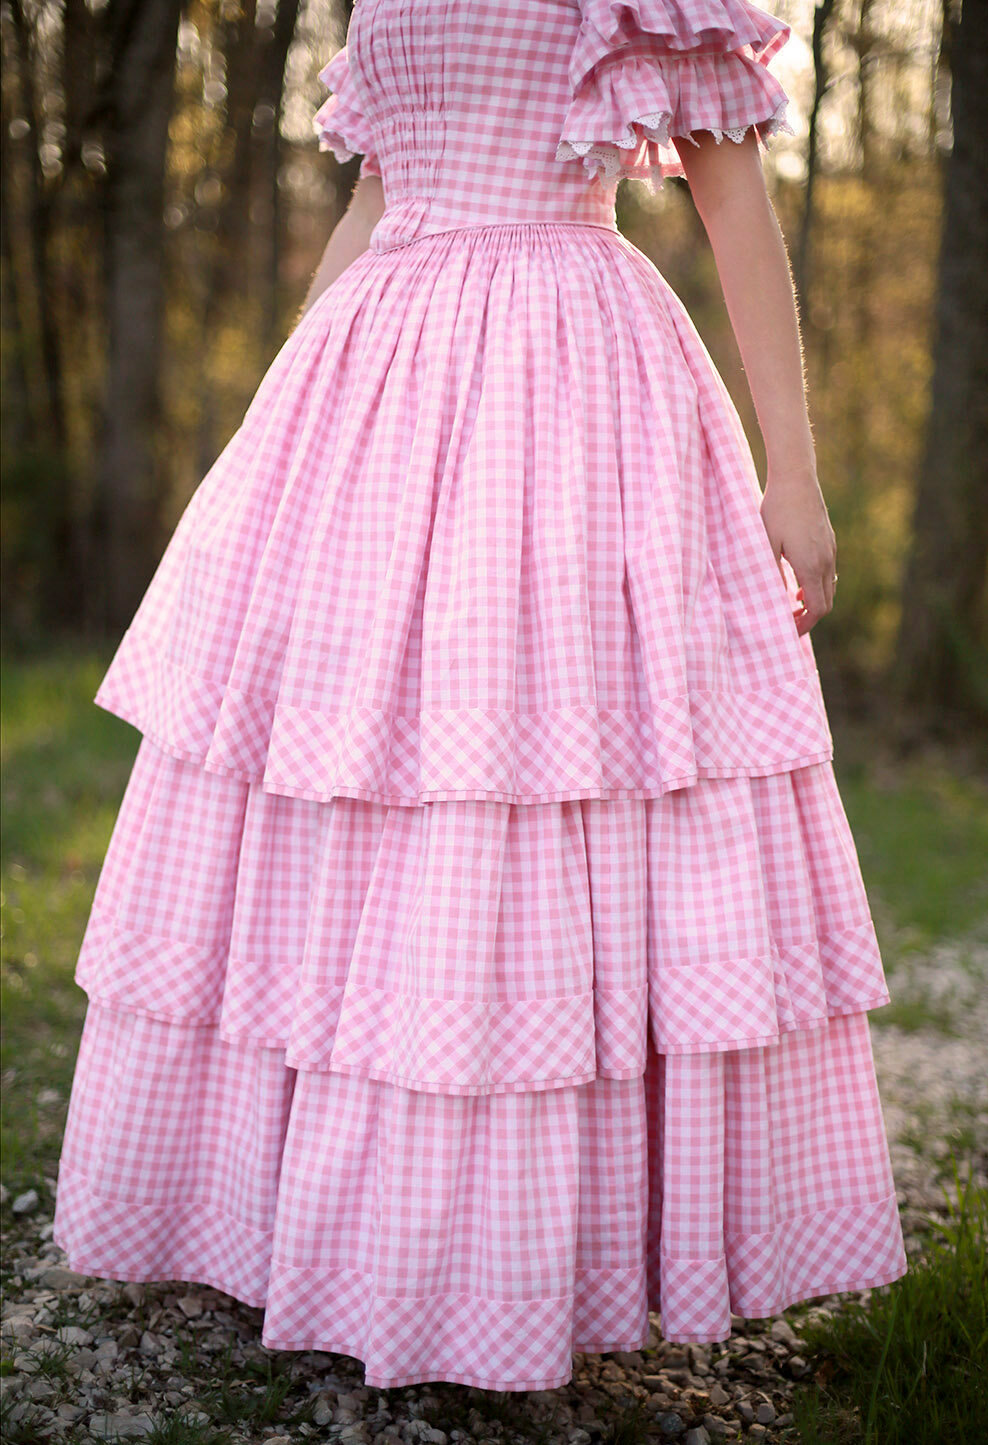
Kirsten’s Birthday outfit by Pleasant Company has three visual layers to her skirt - her pinafore, dress and petticoat. I’ve chosen to interpret these layers into the very fashionable three tiered skirts of the 1850s. The first tier of the skirt is 135” wide and cartridge pleated into the waistline with an additional petticoat underneath that’s built into the dress. Imagine on knee length gingham layer over a white floor length layer (which serves as the base for the second and third layers). I hand sewed the top layer and petticoat to a 1” thick strip of twill tape the length of my waist. That tape was later sewn directly to the twill lining and the bodice was overlapped and hand sewn down to each pleat.
Now back to the bottom layers! I don’t currently have a set of hoops to wear underneath but if I ever add them to my costume kit, they would really extend and widen the look of the skirt! The bottom two layers are 240” wide, gathered, and sewn down directly on the petticoat. Prior to any construction, I marked the placement of the layers. That’s because each tier is hemmed before gathering by turning up the bottom edge and covering it with the 3” wide bias detail (which was appliquéd by hand on top!) This is one element of my costume that doesn’t have any direct reference back to Kirsten’s PC dress, but was an artistic decision that ties back to historical research. (examples 8, 8.1)
Flower Crown
So much of this springtime edition of The Kirsten Project revolves around what was in fashion during the 1850s - color trends (think pink!), gingham fabric, and voluminous tiered skirts. One element that has ties to both fashion and to Swedish culture is Kirsten’s flower crown.
One of Sweden’s biggest (and oldest) celebrations is the summer solstice tradition of Midsummar. Flower crowns are worn by young and old, men, women, boy and girls. The tradition goes that unmarried people pick seven different kinds of wildflowers to make into their crowns and then put them under their pillows to dream of their future spouse. This reminded me of the following passage in Happy Birthday, Kirsten!
“Pick as many daisies as you can!” Anna told everyone. “We’re going to make daisy chains.” All eight girls fanned out across the meadow. It was the day of the barn raising and they were picking wildflowers.”
“Happy Birthday, Kirsten!” Lisbeth said. She placed a wreath of flowers on Kirsten’s head. The blossoms tickled Kirsten’s ears through her long hair.
And although it’s not part of her outfit, Kirsten’s mom also bakes a cake called Jordgubbstårta, topped with strawberries and fresh cream - a very popular Swedish Midsommar dessert!
Flower crowns aren’t limited to Scandinavian culture of course. Queen Victoria wore a crown of orange blossoms at her 1840 wedding and First Lady Mary Todd Lincoln wore flowers in her hair for many of her portraits (examples 9, 9.1, 9.2, 9.3). You’ll find floral hair decorations throughout the 1840s-1860s on fashion plates and in lady’s magazines.
In the pioneer spirit of making do with what’s available, I used flowers I could find in my stash of old spring wreaths and intermixed those with faux flowers I bought this winter in preparations for this project. I really love cobbling together what I can find around the house and I don’t think it could have been as lovely if I had bought everything new. And just in case you’re wondering, there are seven different types of blossoms arranged throughout. I’d sleep on it, but I’ve already found my perfect match in my husband Adam, who shot most of these photos (Felix also took a few!!)
Around my neck I’m re-wearing the amber heart necklace on a brown silk ribbon (I dyed it using walnut husks I collected from my yard!), which was a part of my Meet Kirsten look.
Socks and Boots
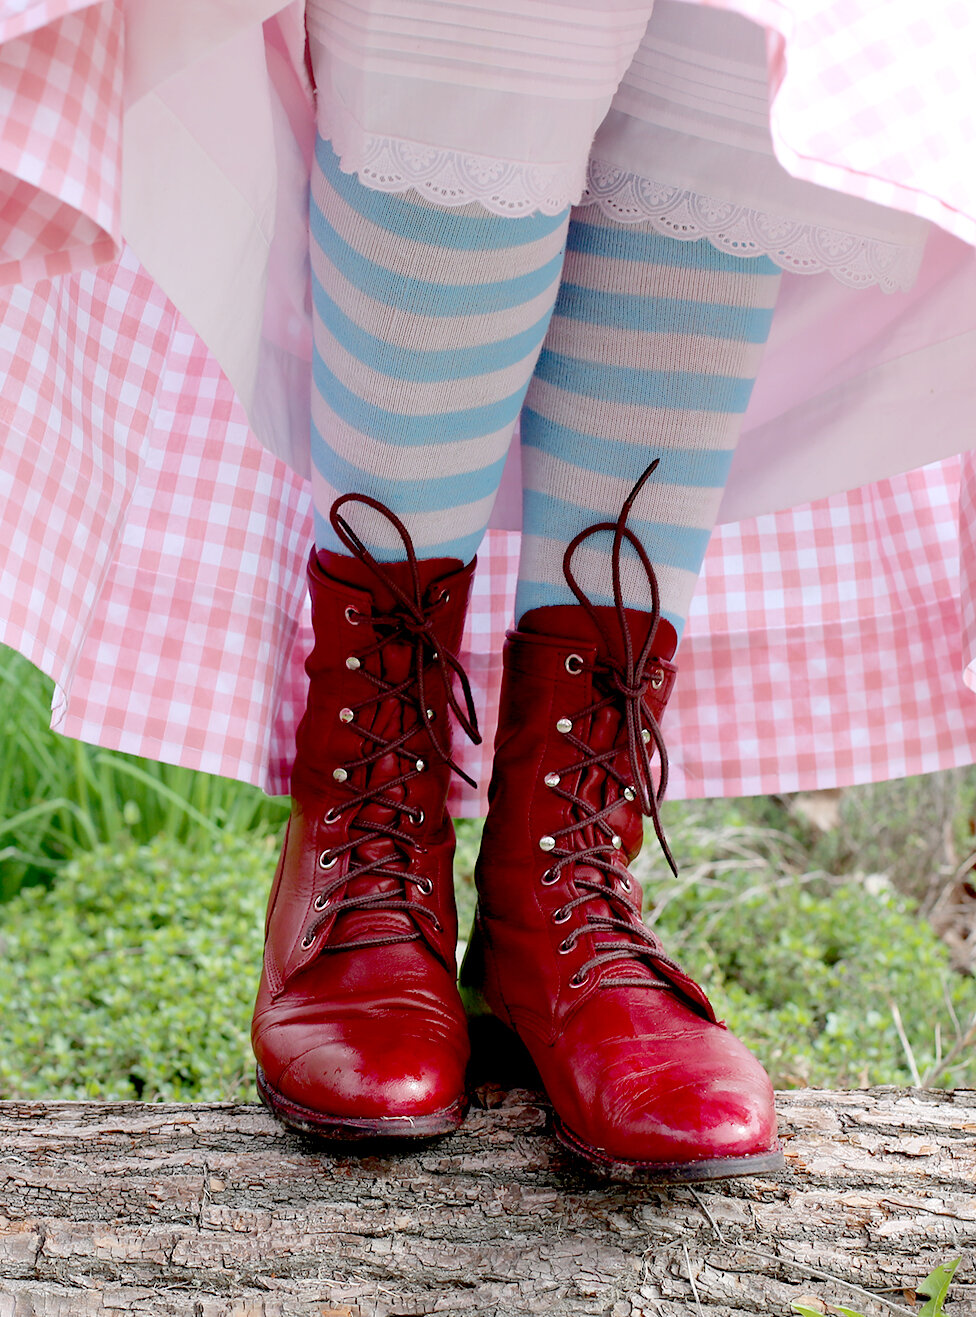
I’ve always loved the combination of pink with red and Kirsten’s birthday cover outfit is no exception! I searched high and low for weeks to find a pair of vintage Justin lace up boots and actually found them in a shade of taupe on eBay (see the before here)! I used leather dye to give them their rich red hue. Red shoes were popular for Victorian children, although examples of this particular color and style together were difficult to research. More often I found examples that buttoned up the outer ankle, which was a common style of boot at the time. I’m also wearing blue and white striped socks (ready made), just like the cover.
I hope you’ve enjoyed this springtime installment of The Kirsten Project! Many thanks to those of you who chipped in this winter to help me purchase my fabric and supplies that made this costume possible. And thank you to all of you that have been so encouraging in this process, including the American Girls podcast, the Serious Crafts podcast and every person who has messaged me to share their own American Girl stories over the past months! It feels good to think about a time when I was a child - safe, curious, inspired, and playful. Completing this project, photographing, editing and writing about it - has been a positive light that has kept me from sinking too far into darkness while isolated. Here’s to silver linings, the beauty of a new season and all of the good things to come.
